The Desktop Control Panel for Digital Advertising Media (DAM)
As software changes some features and screens might be a little different looking.
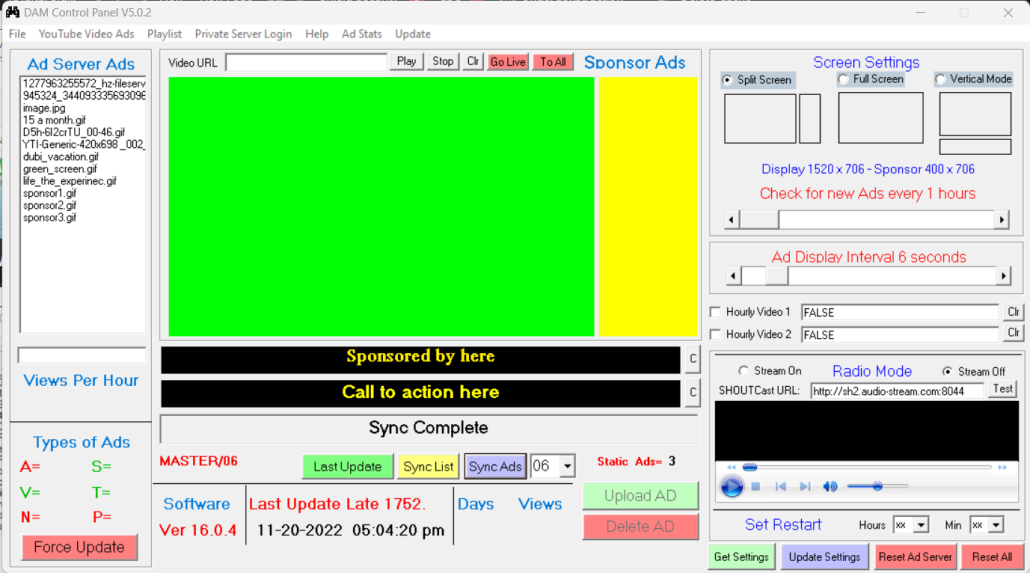
This software is updated often so make sure to watch your emails for changes.
Get the update from here after you install it first
Features so far:
- See the types of ads (1, 2, 3, 4, A, S, V, H, T, N, and P) on an Ad server (This will only work if you use our File Naming Convention shown here)
- See what ads will be billed for if using the DAM Naming Convention
- Set the display type Single Screen, Dual Screen, Radio and Multimedia Stream modes.
- Set the ShoutCast Radio Stream if in Radio Mode
- Test Radio Streams
- Activate Ad Servers
- See how many times an ad was displayed since the last software update or reboot of the Ad Server
- See the software version each ad server in your network is running
- See the last time your ad server checked for new ads
- See if your ad server is working or not by comparing its last update time
- More to come…
To connect to your Ad Servers follow these simple steps
1- Click on “File” & “login“
2- Type in your Server’s Computer name without the server number. An example would be “DEMO” for a system named “DEMO-01”. The system will default to the first server(-01) in your network. If you don’t know this name look at your running ad server status bar at the bottom.

3 – Once the status reads “Folder Set” it will connect to “01“, the first system in your network. You can select the Ad Server in your network by clicking on the drop-down arrow if you have more than one system.
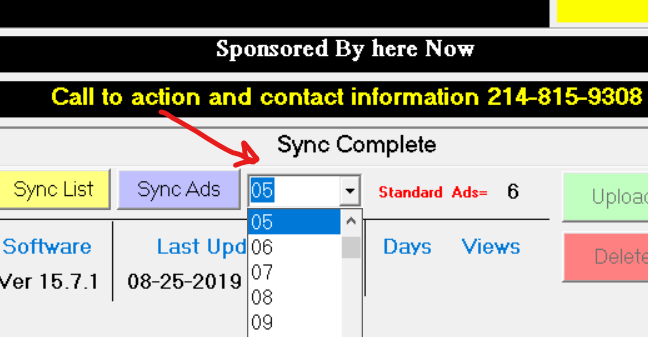
4 – Now you can Synchronize the ads in the selected server so you can see what’s going on. There are two types of Syncs, (Sync List and Sync Ads). Sync List does a quick download of settings and just the list of ads on the Ad Server. While Sync Ads downloads the settings and the actual ads themselves. If you Sync Ads you can click on the file list and display the ads on the screen. Select one of them and wait until it completes which will read ” Download Complete“
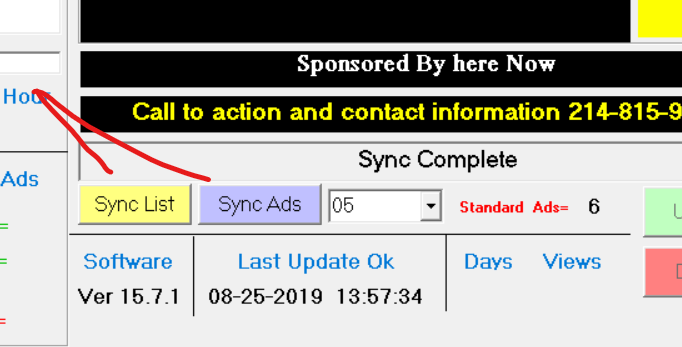
You have now synchronized with your ad server and can see what it sees and the status of the ads and the system you are synchronized to. You should see a count of ad types in the system and an estimate of how much you will owe on the 1st of the month.
If your Ad Server is not updating at the proper time you will see the label “Last Update” in RED and Blue if OK. If you get a red color this could be from a bad internet connection or a power outage at the location where your ad server is located. Call or visit the location from time to time to make sure they are happy and your system is working properly.
Screen Mode Settings:
You have two types of layouts which are Split Screen and Full-Screen modes to run your ad server in. Most of you will use the Split Screen mode to take advantage of having a Sponsor. When you have a sponsor you basically have a FREE business making 100% pure profit from ad sales.
You also set the screen resolution of the software to match your TV capabilities and to fill the screen for the best viewing.
Custom Screen Settings: The default screen ratio is 11 x 8 with the split or full-screen mode. Most TVs and Ad Servers will set themselves to the maximum display size of 19200 x 1080 and this is ok if it fills the screen all the way. You want to use the custom screen sizing features built into the Ad Server software to set up every system the first time and when or if you change out the TV. Click here to learn how to create a Custom Screen setting file.
Once this custom file is created the Ad Server will remember this and stretch your screen to fit perfectly on the TV. This will also give you the exact pixel sizes for the Ads you create.

You can have your Ad Server check for new ads from 1 to 12 hours. The longer you wait to check for updates the least amount of internet bandwidth is used. A larger number is better for mobile applications using broadband mobile access cards and or dial-up if you still have that.
The next setting is how long each static Ad stays on the screen by default. When your system comes to you it will be set to 15 seconds for better persistence to the viewers. You can set this from 5 to 15 seconds with the sliders for the system and you can set this per AD using the “U_” naming convention you can see here.
Hourly News and Weather
The Hourly video stream settings area

These two streams can be activated and deactivated by checking the box next to the URLs labeled as such. A check means it is activated and will show start streaming at the top of each hour. No check means no streaming. You can have one or the other or both activated and each stream lasts for about 5 minutes or so.
These two links can be used for anything other than News and Weather too. Some will use them for advertising the billboard itself or for a special advertisement you can charge for.
These URLs can be very long so I added Clr to clear out the URL stream for you before adding a new one for ease of use.
The News stream in Cheddar News is a general news and the Weather is from Weathernation.
Make sure you test the URLs first here if you change them from the defaults

Remember that these videos eat into your Ad viewing time and make you no money so think about this in your overall business model. You lose about ~11 minutes per hour if you have both the News and the Weather activated.
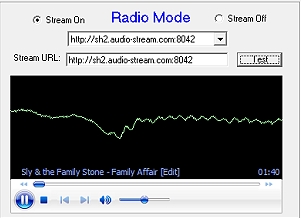
Each Ad Server can provide streaming information such as Radio and Music for the hosting location. This is great for ambient music, talk radio, live news, remote DJ service, and more as long as it is a Shoutcast Stream URL.
We have provided some Shoutcast Stream URLs in the dropbox for you to use and test. You can also just type in a known good URL and click on “Test” to make sure it works. When you save the settings this URL will be locked into the Ad server for streaming.
A more detailed definition of how to set this up here
To update the Ad Server click on “Update Ad Server Settings“
Remember to connect speakers to use the Radio Mode
With the latest DAM Live software you can use the Desktop Control Panel to send a video URL directly to a system on location. This is done by pasting the URL to a YouTube or any other video that’s being streamed in the “Media URL” at the top of the screen. You can click on Start to test the video. Click Stop to stop the video from playing. Click “CLR” to clear. click on Go Live to send to the Ad Server and about 30 seconds later your system will stream the video until you stop it or it ends on its own. It will go back to normal operation after that. The live formats are listed on the Billboard TV page here.
Sending Video to one or more Ad Server immediately
As you all know (or not) your systems can display video in many formats from video files, and video streams like YouTube, Vimeo, and even HLS LIVE Stream URLs.
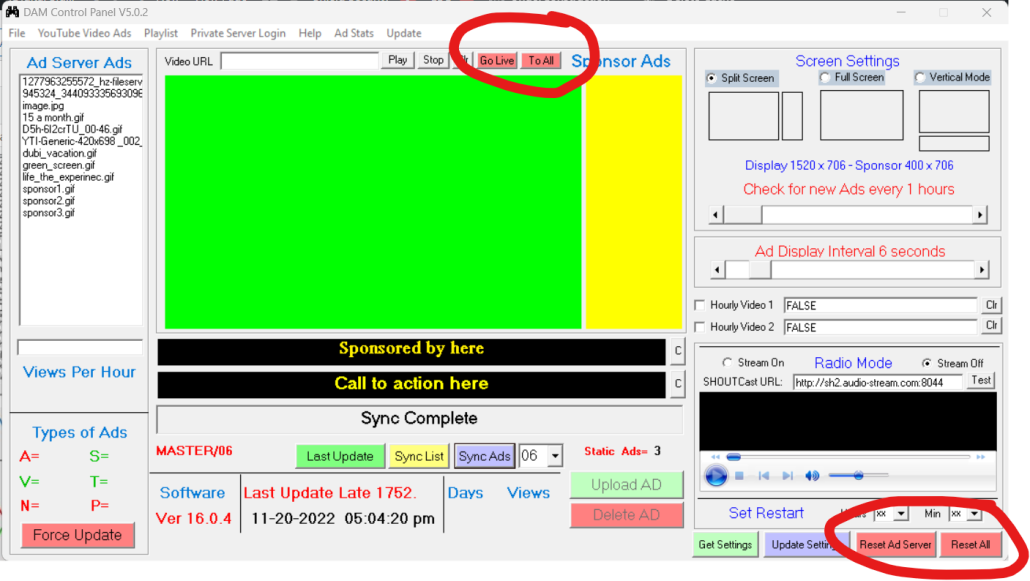
Well, before now you could select an Ad Server (digital billboard systems) location and send a Go Live command to that system in real-time via the Desktop Control Panel software. Now you can send to all your Ad Servers in your network at once as well as reset them all at once. This requires the latest version 4.9.4 to have this function.
Using the new features:
At the top of the Desktop Control Panel software, you will see the buttons “Go Live” and “To All“. These buttons will send the “Media URL” to the selected or all Ad Servers in your network respectively.
To send to just the selected Ad Server:
Step 1: Find a video URL from either YouTube, Vimeo, or any other place that hosts videos and or Live Streams and paste the URL into the area named “Media URL“.
Live streams can also be in the form of an HLS URL like this: https://live.chdrstatic.com/cbn/primary/1.m3u8 which is the Live Stream for Cheddar News.
Step 2: Press the “Start” button to make sure it works in the Desktop Control Software first. If it doesn’t work here it won’t work on the Ad Servers either. Some streams and videos are blocked from working outside their hosting location so always test them all first.
Step 3: Now choose how you want to push the video content to your Ad Server(s). If you push “Go Live” it will only stream on the selected Ad Server you Synced with. If you want the video source to go to all your Ad Server in your network click on “To All“.
Note: Depending on your video content the Ad Servers resume displaying ads after the video is done, however, if you are doing a LIVE Stream and there’s no end the Ad Server(s) will never stop streaming until you press “Reset Ad Server” or “Reset All” respectfully.
An example of using this for stopping live streaming video would be when you stream an event like basketball, football or some news event, but you don’t know how long it would last. Logging in to your server and then clicking this button will stop the stream.
Note: if you still have the “S_” tag image uploaded to your Ad server the system after resetting it will restart the streaming so make sure you remove these two files first before clicking on Rest Ad Server. Learn more about TV Mode here
Setting the Sponsor (Branding) Text and Scrolling Text areas for each system.

When the Desktop Control Software is synchronized with a system you can change the two areas that display text.
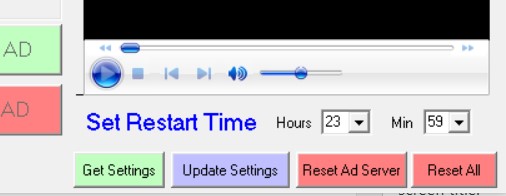
Step 1: First “Get Settings” to make sure you have what is on the system shown in the software window.
Step 2: Double-click in the black areas where the text is to make changes. You can delete what is there and write something new or just edit the text shown and when done click OK. Do the same for both areas of text.
Step 3: To update the Ad Server click on “Update Settings“
Note: If you’re using the No Internet option make sure you have no numbers for hours and minutes (delete the numbers) and save it that way.
That’s it, the next time the Ad Server checks in the text areas will be updated also.
To Generate a Full Report of all your Ad Servers in your account, click on “File“, “Report (HTML)” or “Ctrl+R“. Make sure you have logged in to your Ad Server account first as shown above.

An HTML webpage will be created and displayed in a few moments. Depending on how many Ad Servers you have in your account they will be listed with information about them.
If you have Ad Servers in your system that has not been activated there is a one-time $50 fee for each.


