
So many TVs and Monitors are different and have higher and higher resolutions so I added a custom sizing routine to help with that directly in the software itself.
Using the Custom Settings method:
Step1: Run the Desktop Control Panel software and connect to your server.
Place your Ad Server in the 1024×768 mode which is the smallest setting in the Desktop Control Panel software.
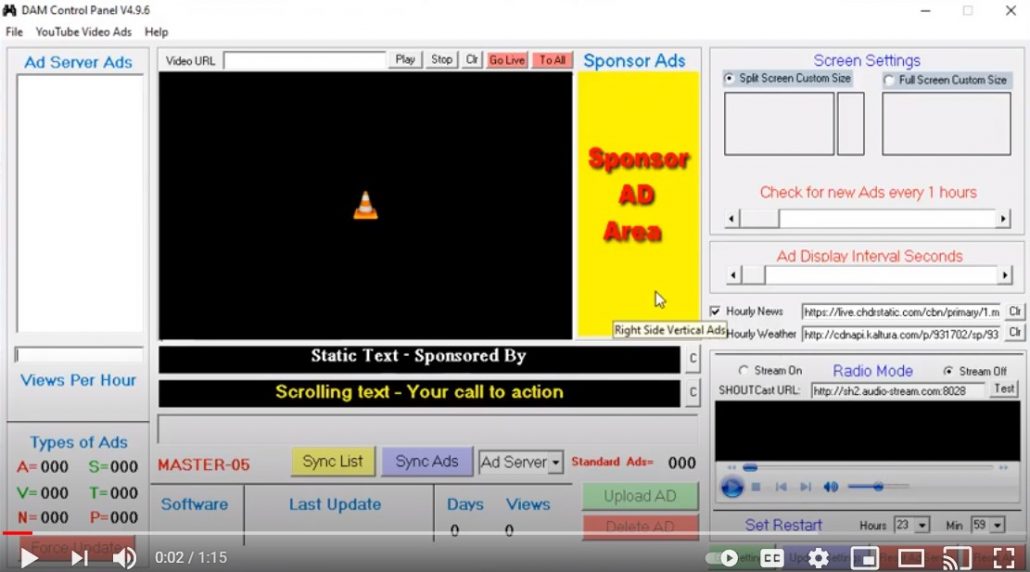
The 1024 x 768 is a special setting and does double duty. When selected it will look for a custom setting file if not found the ad area to fit within a 1024 x 768 resolution by default
Step 2: Connect your keyboard and set Windows screen resolution so that when Windows desktop fills the TV screen in full. Now you have a match with the A Server and the TV screen at its best.
Step 3: Leave the keyboard connected and run the Ad Server software and let it start like normal by allowing the 30-second countdown. This makes sure you get the updates to the latest software.
Step 4: Once it’s done downloading files and running like normal we can now invoke the custom setting routine. The scrolling text should be scrolling and the screen might be very small.
Step 5: Now, Press the “+” key on the connected keyboard. The display will automatically shrink to its smallest size and activate the sponsor area too no matter what you set above in the 1024×768 mode.

Step 6: Now stretch or shrink the display by holding down the keys below until you have the full width of your TV viewing area. Play with this until you get a perfect horizontal and vertical size display.
- “+” or “r” stretch right slow
- “R” stretch right fast
- “–” or “l” shrink left slow
- “L” shrink left fast
- “d” stretch down slow or “D” stretch down fast
- “u” shrink up slowly or “U” shrink up fast
Step 7: Press the “H” key to display the system information at the bottom of the screen and use this as your true bottom of the screen. Increase or decrease vertical size until you see the information just meet the bottom of the screen. This information will disappear after 15 seconds so you might need to press “H” a few times while setting the size.
Step 8: Once you have the display set to perfectly fill the TV screen now press the “S” or “s” key. A window will pop up telling you it saved the settings. Press OK or they will not be saved. You can do this over and over again until you get it right.
Now you’re done.
Restart your system like normal and from now on the software will use these new custom settings for the display area. This will allow you to use any type of screen and any type of resolution theoretically anyway.
Note: If you change out your TV you might have to do this over again since Windows will see the new TV as a different system.
Video here